HubDB is a fairly underused part of HubSpot and that keeps me up at night. So many people just live their lives never thinking about how easy HubDB can make managing their website.
Anyone can get started and set up the perfect table for what they need. While this will get you most of the way to using HubDB on your website, it is important to remember that you will most likely need a developer to fully integrate the content of your HubDB table into the rest of your site.
I am going to give you some examples of what you can do with HubDB and give some ideas you can use as a jumping-off point to get your projects going. But before we get into that, let’s do a quick overview of what HubDB is and how you can use it.
So…How Do I Use HubDB?
Very simply, HubDB is a fancy Excel table that integrates with various parts of HubSpot so that you can access and display that information in almost any way that you want. Fancy means that it looks nice and gives you specific ways to input information that will make displaying it easier.
For a non-developer, you just need to focus on knowing your table options and understanding how they will relate to the end product you are working for. You need to visualize what your website will look like and then break it down into its components. Once you have that set up, it will be easy for a developer to turn that information into a part of your website.
How do you put this into a table?
Let’s first look at the nuts and bolts of working with a table. This is what you are going to see when you first add a row to your fresh table:
This doesn’t help us very much, so we need to add a column to the table to get started. Click on Actions in the top right corner and click on Add Column. (Please ignore that Add Row is highlighted; my screenshot function hates me.)
Once you do this, a box will pop up on your screen:
Here is what all of those options mean:
- Column Label: This is the internal name that will display on your table so you know what information you are putting in the column.
- Column Name: This field will be filled in automatically based on what you put in the Label field. It is the name your developer will reference when using this column on a webpage. The only difference between this field and the Label field will be that it contains no capital letters or spaces.
- Column Description: This is an internal description that allows you to provide more information about what goes into the column. Use this to note specifics about anything you will be putting so that anyone unfamiliar with the setup will be able to use it. A good example is adding image dimensions to your Featured Image column so everyone knows how to upload the perfect image every time.
- Column Type: This is where the magic happens. This field allows you to select what information will be entered in each row.
The last thing we need to talk about before we can get started is your options under the Column Type field.
- Text: A simple line of text. Just type in what you want, and it shows up.
- Rich Text: The text editor on steroids. This gives you access to the full Rich Text Editor in HubSpot and all of the customization that comes with it. Use this for long-form content.
- URL: Works just like the Text option, but the table will recognize anything in here as a URL.
- Image: Allows you to add images to the table using the HubSpot image selector you know and love.
- Select: This lets you make custom options that appear in this column. You can add as many as you want, but you can only pick one. Great for Yes or No options.
- Multi-Select: The same thing as Select, but you are allowed to pick as many as you want. Perfect for tags and categories!
- Date: Brings up the HubSpot date picker.
- Date & Time: HubSpot date picker with the ability to select time as well.
- Number: Numbers only.
- Currency: Same as the Number field, but it will automatically format them into the currency type you use. Note: You will not see this reflected on the table itself
- Checkbox: A simple checkbox and nothing else. Click it to put a check in it. Click it again to get rid of it.
- Location: Allows you to type in an address and then puts that in the table for you.
- Foreign ID: This allows you to access rows of other tables, so you don’t have to do the same work twice.
- Video: Uses HubSpot video to add any video in your portal to the table.
Ok, so now that is all out of the way, let's dive into how you can start embracing HubDB for dynamic content on you website!
Resource Listing
Listen, I know this is the stock standard thing you are going to see when looking up anything about using HubDB. I get it, but I am still going to talk about it because I am on a crusade to wipe using the blog section of HubSpot to make a resource center from the face of the Earth. Seriously, if you still have a blog resource center and are not actively looking to replace it with a HubDB table, you are my enemy.
The main thing you should plan for any HubDB project is what it will look like on the page. This is going to be the backbone of your table, so you want to make sure you have a solid vision of it in your mind. If you have ever seen a Resource Listing before, you know the basic parts: featured image, title, description, link. If you have never seen one before… Welcome to the Internet! How did you get here first?
All you need is a Text Column, a Rich Text Column, a URL Column, and an Image Column. Once you have set everything up, your table should look something like this:

Remember: You can drag and drop the columns to order them any way you want. Make sure you are setting up your tables so that they are easy and quick to update.
You don't have to stick with the most basic option, and most of the time, you shouldn't! One of the biggest benefits of using HubDB is that it makes your content easily filterable and searchable. You can easily add a place to differentiate your offers by resource type and tag so that it is easy for your readers to find exactly what they are looking for. All you have to do is add a Select and Multi-Select Field! It would look something like this:

That's it! You have everything you need to create a Resource Listing on your site. Just set it up and flavor it to taste.
Event Calendar
Have you ever struggled to keep your company's events up to date? Maybe you use a paid service to handle them all, like EventBrite, to keep them all in order, but you don't like how little it reflects the branding of your site. Don't worry; HubDB is here for you!
How this displays exactly on your page is going to be up to you and the developer, but there are things that any event is going to need: Title, Description, Date & Time, Location, and Sign Up Link. You can set this up easily in HubDB using the following fields: Text, Rich Text, Date & Time, Location, and URL. If you put it all together, it looks something like this:

Don't worry; the Location field displays as coordinates, but it will not appear like that when you display it.
You even have a few options to customize this table further. You can take a tip from the Resource Center and add Tags and Categories to give your users more options to find the perfect event for them. Then, add a Currency field to display ticket prices.
Comparison Table
What better use is there for a HubDB table than to make another table? You can easily set up a comparison chart on your site that you can easily edit and reorder using a couple of fields. Use a Text column to lay out your features, then set up some Checkbox Columns for each of your package levels. Then, all you have to do is check off the ones you need and send that information to your pricing page. Here is what it could look like:

Have your developer do a bit of formatting, and you now have a pricing table you can update in seconds.
Team Listing
Never fight with your Team page again! Putting a quick HubDB table together can save you so much time whenever a team member is promoted or leaves the company. Set up a few columns to cover your bases, and you will have a team database in no time. Here is an example:

With this set up, you can easily keep up to date with your Team page listings.
An Entire Webpage!
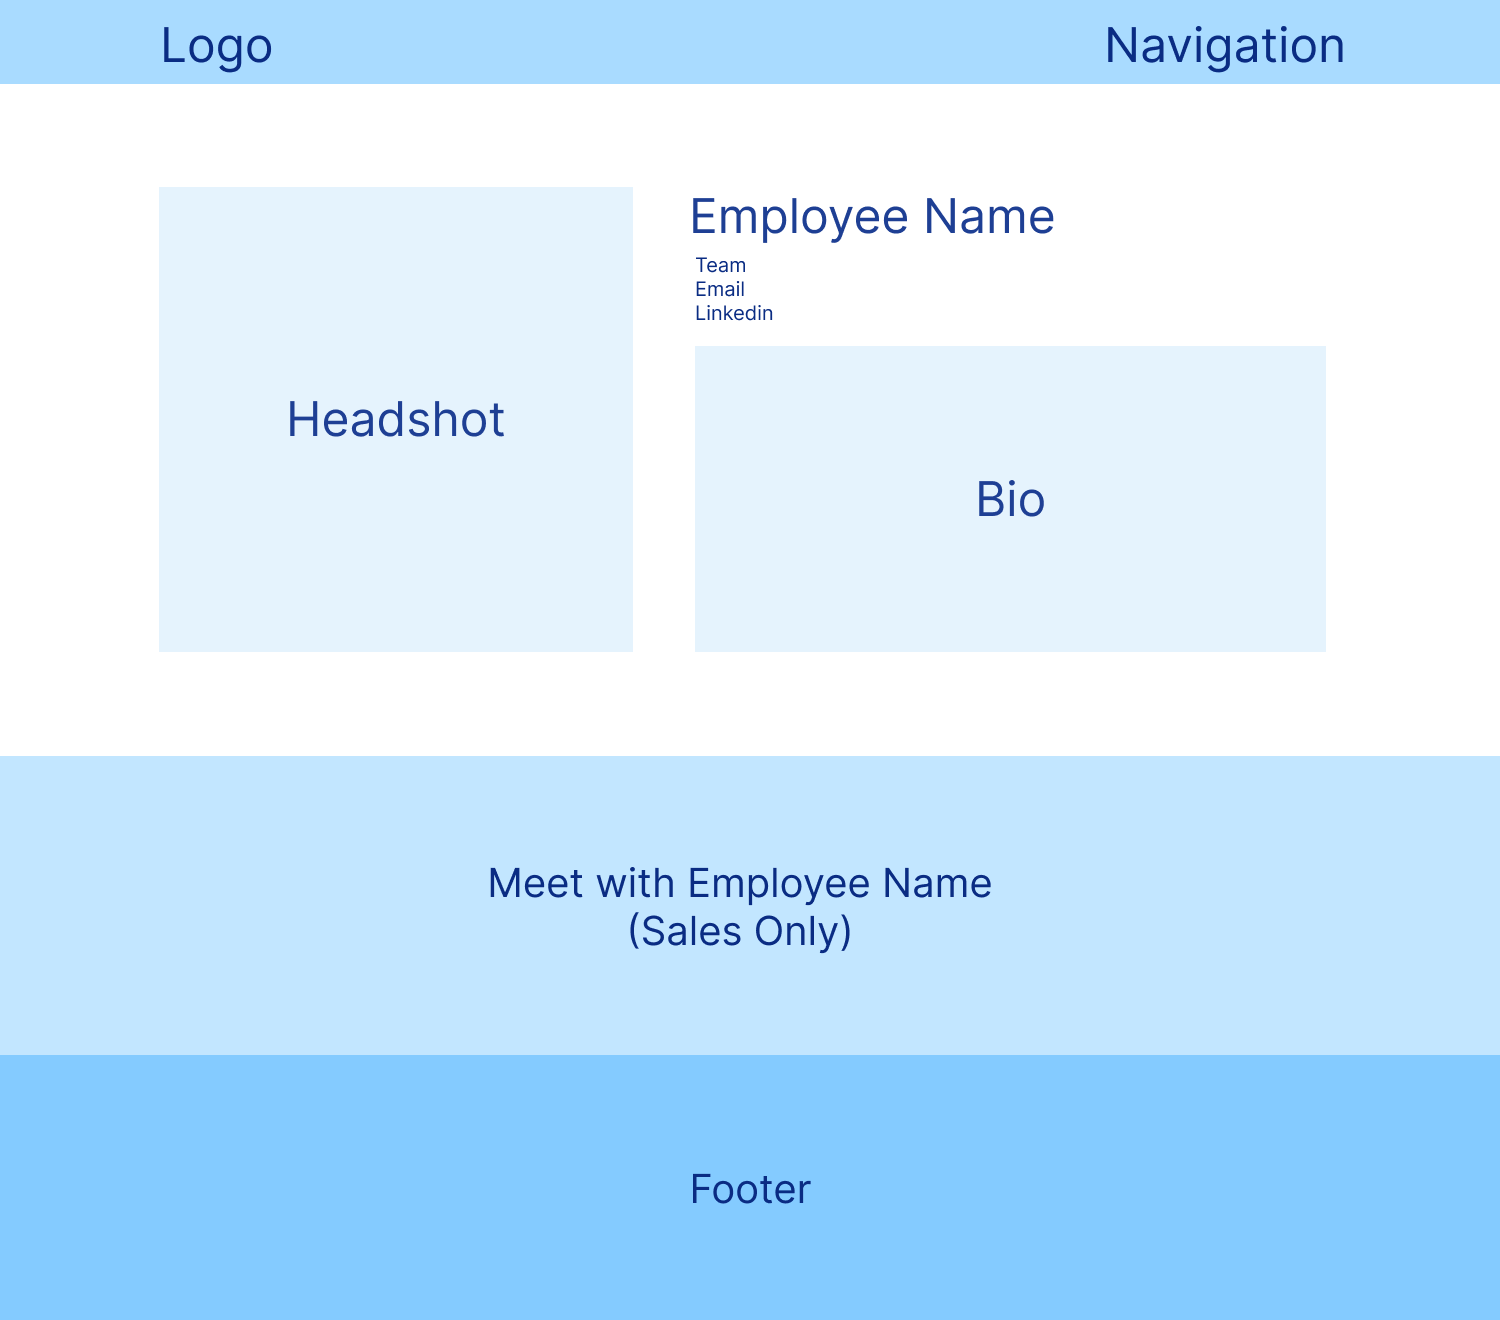
HubDB is not limited to just creating listings for various things on your site. You can use it to create web pages with the click of a button! Just set up your columns and then lay them out in a wireframe for your developer to set up. Instead of looking at a table, let's do an example wireframe of how to use that same information to create a Team Member Profile page:

By simply laying out a few squares on a page, we can design an entire webpage! Once your developer has had a chance to set up the module you need, you can create a full webpage in about two clicks. One to pick the module and the second to tell it what row's information to grab. You can do something like this for any of the examples listed above and make your website that much easier to maintain.
HubDB is a really powerful tool that can be used for so many things. While I have given some examples here, there are countless things that you can do with it. I encourage you to test the tool out and see what you can come up with. Once you have a grasp on what you are trying to display, reach out to a developer and see how you can turn it into a reality for your website. I have it on good authority that the team at HIVE is fantastic at creating dynamic HubDB content, so reach out and see what we can do for you!


.png?width=100&height=100&name=HubSpot%20for%20K%E2%80%9312%20Education%20How%20Schools%20Use%20HubSpot%20to%20Improve%20Enrollment%20(and%20How%20to%20Set%20It%20Up).png)
.png?width=100&height=100&name=The%20Complete%20Guide%20to%20HubSpots%20Prospecting%20Agent%20(2025%20Edition).png)
